Project description
Timeframe:
3 months
Group size:
Me
This project is a demonstration of procedural animation using splines. Procedural animation is when algorithms are used to control the animations of something, instead of manual keyframes/sprites.
This project is partially inspired by Argonaut and t3ssel8r on YouTube, as well as my previous attempts to use splines.
Table of Contents
Tools
Framework:
– Monogame
Shape library:
– ShapeBatch
Drawing program (for icons):
– Aseprite
Version control:
– GitHub & GitHub Desktop
Code editor:
– Visual Studio
Resources
Spline paper (I can’t figure out the source book)
– Spline Curves
Matrix class
– LightweightMatrixCSharp by darkdragon-001
Download
Idea & Planning
Idea
The original idea for the project was from this video by Argonaut, but the bulk of the work in my project was on the rendering, since I wanted to make splines and generate a mesh using them, while his rendering was done through an existing library.
About nine months before starting this project I had worked a little on a very similar version of it in Unity, but ended up stopping after college classes started. During the second semester my programming teacher introduced the class to MonoGame, and I thought doing it through MonoGame would be an interesting challenge and would enable me to do some things I wouldn’t as easily be able to do in Unity.
Planning
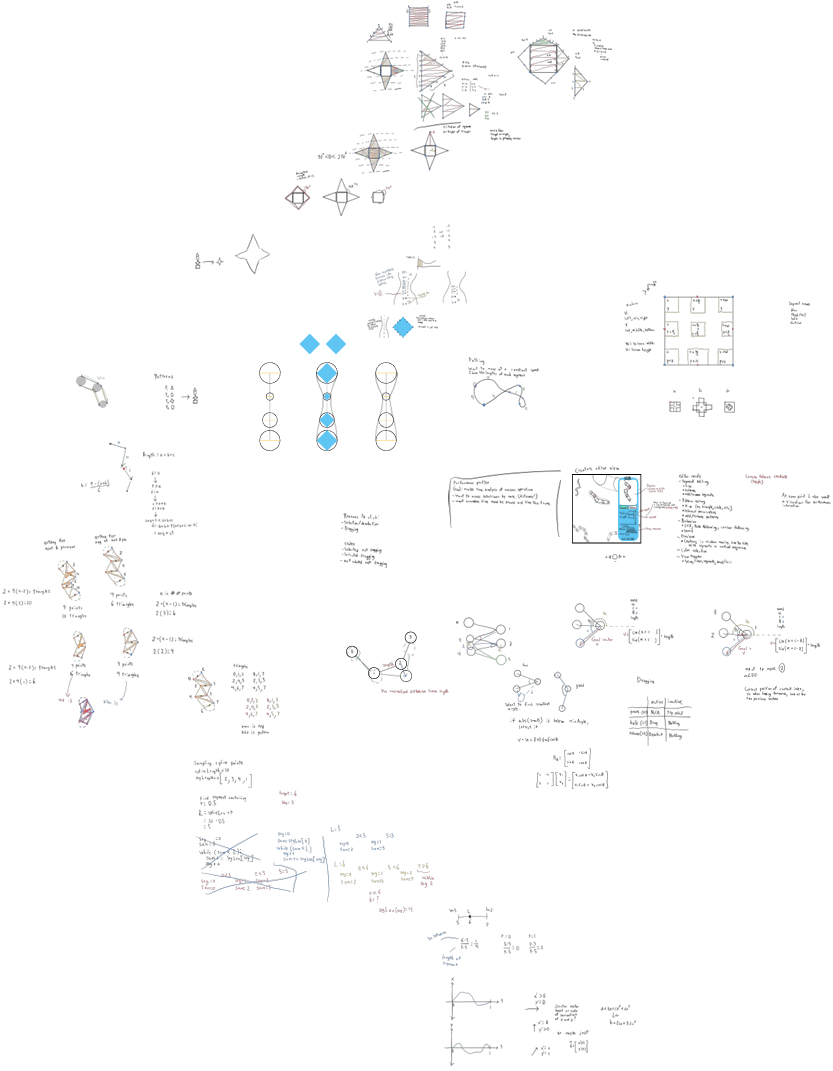
Before working on different parts of the project, I would usually try to plan out how I would do it on a Freeform whiteboard. I found this very helpful as it directed and structured my work.
Setup
The most important thing to get set up first was a way to actually render things. MonoGame only enables you to draw textures (images) and text, so I use the ShapeBatch library to be able to draw whatever shapes I need. This let me make a basic mesh renderer that drew a Mesh object, composed of vertices and triangle indices. I chose to use triangles since they are what many modern game engines use, and any 2D shape can be broken down into triangles. The mesh renderer is updated throughout working on the project.
Basic working version
Constraints
Constraints are the core of the animation side of this project. They allow the chains to move in a natural looking way. The distance constraint lets the chain be pulled from any segment to move the entire thing, and the angle constraint helps the chain not collapse on itself.
Distance constraint:

Angle constraint:

Distance constraint code (doesn’t exactly match what’s in the project)
/// <summary>
/// Constrains {a} to be {distance} away from {b}.
/// </summary>
Vector2 ConstrainDistance(Vector2 a, Vector2 b, float distance)
{
    return b + Vector2.Normalize(a - b) * distance;
}
Angle constraint code (doesn’t exactly match what’s in the project)
/// <summary>
/// Returns the Vector2 a segment should be when its angle is corrected.
/// {v1} is the vector being corrected.
/// </summary>
Vector2 ConstrainAngle(Vector2 v1, Vector2 v2, Vector2 v3, float angleConstraint, float length)
{
    // get the signed angle between the three vectors
    float angle = AngleBetweenVectors(v1, v2, v3);

    // should the angle be constrained?
    if (MathF.Abs(angle) >= angleConstraint)
        return v1; // don’t constrain

    // get the signed angle between +x and v3
    float angleToFirst = AngleBetweenVectors(Vector2.UnitX, v2 - v3);

    Vector2 goal;
    if (Clockwise(v1, v2, v3))
    {
        // rotate counter-clockwise
        goal = AngleToVector(CreatureSegment.minAngle + angleToFirst) * length;
        // flip x
        goal.X = -goal.X;
    }
    else
    {
        // rotate clockwise
        goal = AngleToVector(CreatureSegment.minAngle - angleToFirst) * length;
        // reverse vector
        goal = -goal;
    }
    return v2 + goal;
}
Splines
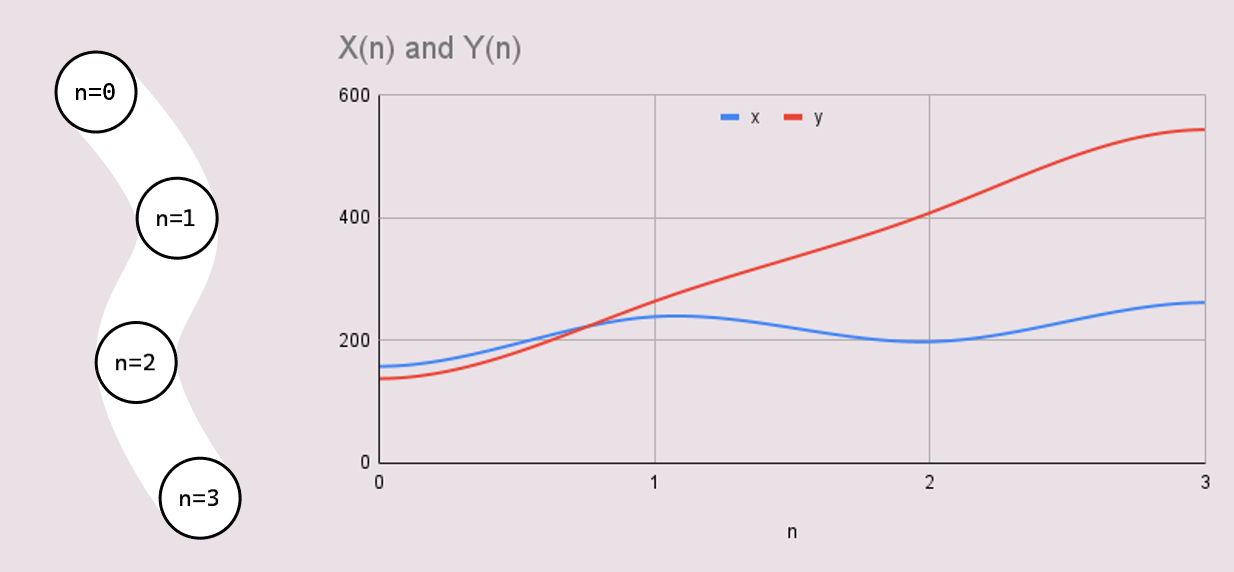
A spline is a piecewise function of polynomials used for interpolation or approximation. Splines can be created using a sequence of points as inputs, and animated by moving those points.
Splines are a very important part of what makes this look coherent. They are used for both interpolating between the positions and the radii of the segments.
The splines used in this project are third order/degree splines, as higher orders become more sensitive and less consistent, while lower orders just lack as much detail.
These splines are created by solving a system of equations using matrices.

Spline Parameterization
The position spline is two dimensional, since it needs to represent both x and y. Since the spline needs to be a valid mathematical function (i.e. pass the vertical line test) the spline is actually two single-dimensional splines. To enable this, both splines need to share an input variable (n), while being different functions.

If you want to learn more about splines:
This paper is where I got the equations for the splines in the project from- Spline Curves
This video has a lot more information on splines in general- The Continuity of Splines by Freya Holmér
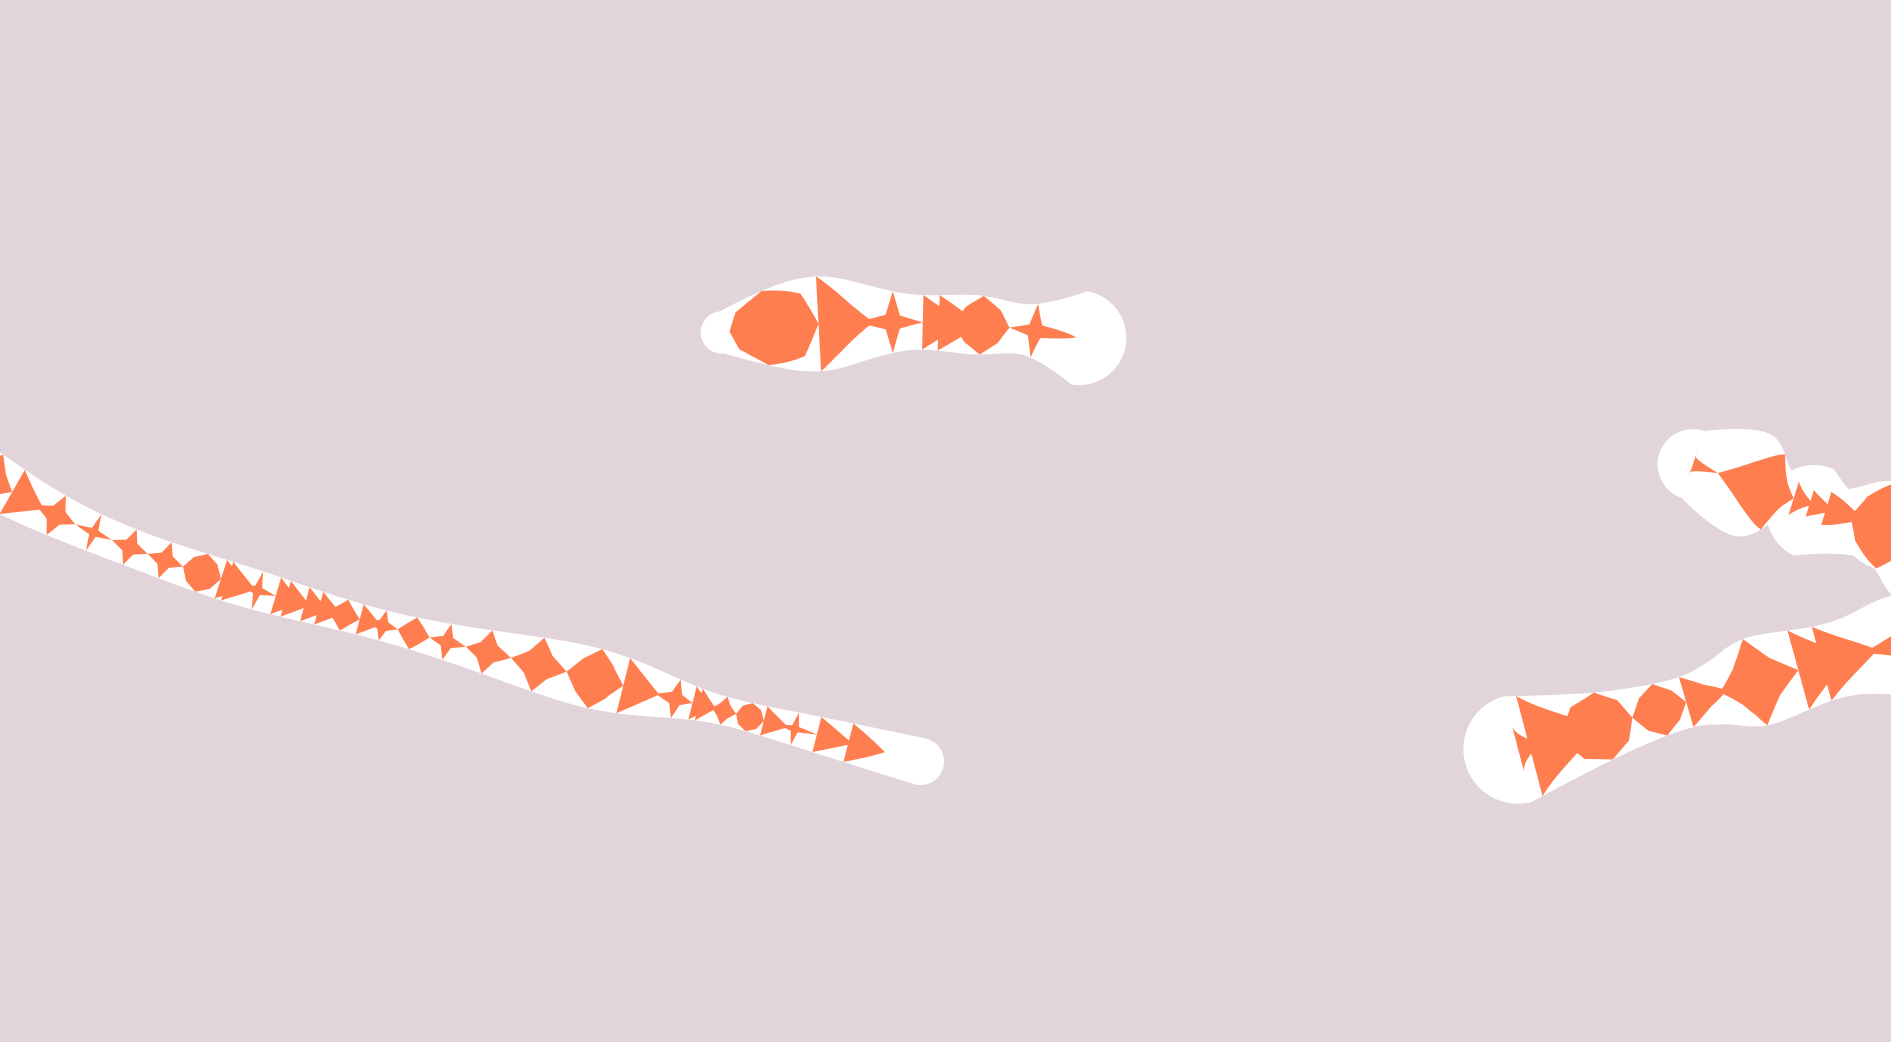
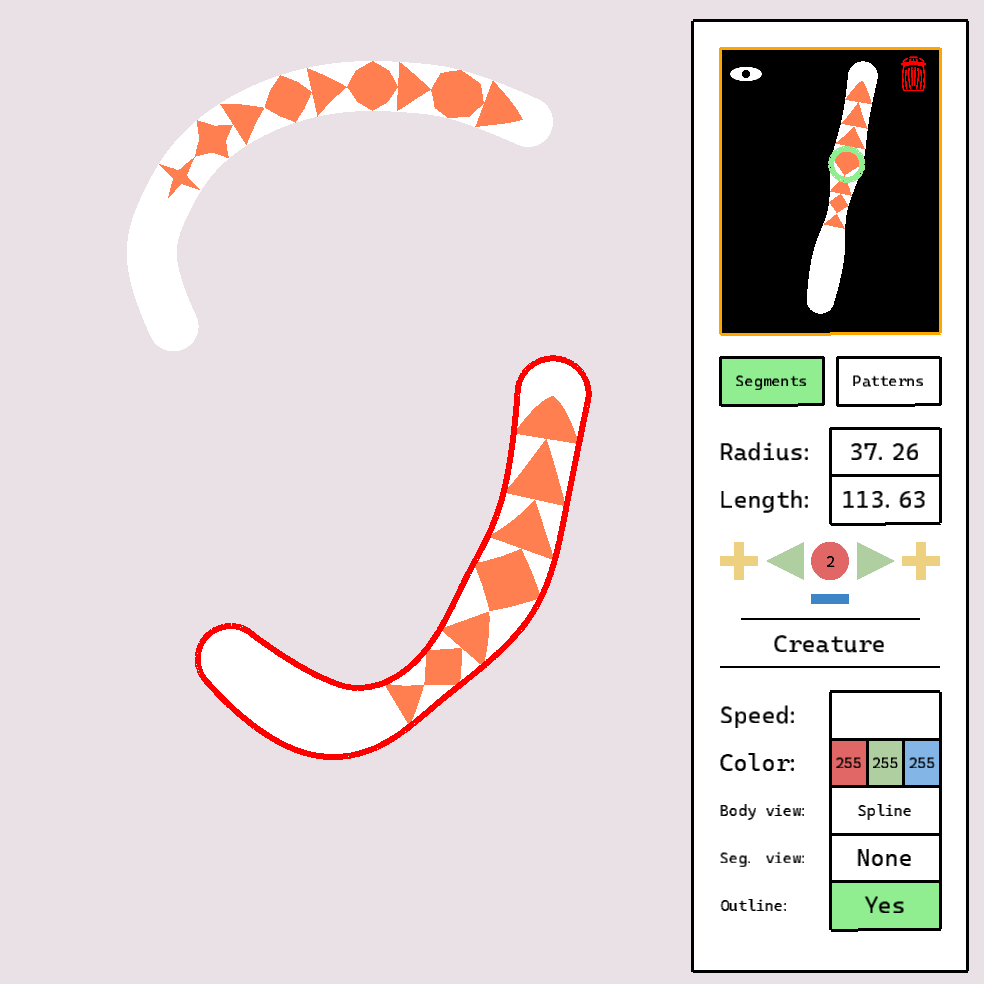
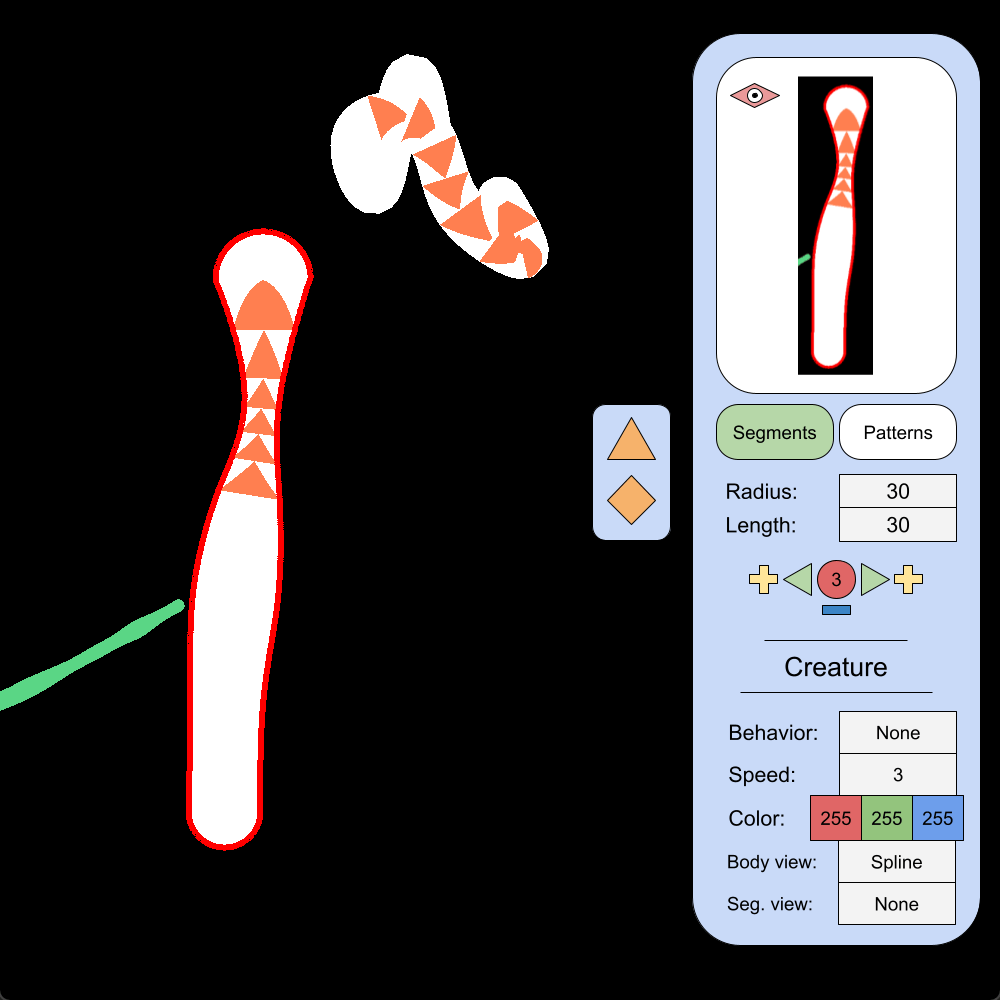
Patterns
Having patterns on the creatures is an idea I came up with partway through the project.
The basic idea is to have a chain of connecting shapes along the creature that deform to match it.
The only patterns I ended up creating were a triangle shape, and a 4-point star shape, but adding others would mostly just take as long as it takes to write a mesh generator for the pattern.
One challenge of the patterns is that the distance along the creature to put the next point is dependent on the radius, which can potentially be changing. The way I solved this problem was to vertically sort all the points, and then in order update their heights to be the height difference between points in the unmodified mesh times the radius at the point, plus the previous point’s height. This is an approximation, but it works fairly well.

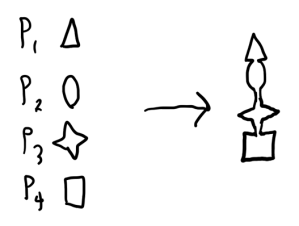
4-point star pattern explanation
The star pattern is made up of four triangles, and a square.
One thing to notice from the gif on the right is that the width of the triangles isn’t important. This is because the way points are transformed only depends on the point they are perpendicular to the spline at, and not how far from that point they are.
To get the points in the correct position, they are rotated using the derivatives of the spline at some N value, scaled by the radius at that N, and then translated to that N on the position spline.
Point to creature transformation (doesn’t exactly match what’s in the project)
// t goes from 0 to 1 across the entire creature
for (int v = 0; v < patternVertices.Length; v++)
{
    float t = tValues[v];

    // rotate => multiply by radius => offset to correct position on creature
    Vector2 derivative = spline.CalculateSplineDeriv(t);

    patternVertices[v].Y = 0;
    // angle is from a vector perpendicular to the derivative
    float angle = VectorToAngle(new Vector2(-derivative.Y, derivative.X));
    patternMesh.Vertices[v] = RotateVector(patternVertices[v], angle);
    patternMesh.Vertices[v] *= radiiSpline.SamplePoint(t);
    patternMesh.Vertices[v] += spline.SamplePoint(t);
}
UI
The UI came about because I needed some way of live editing values, and potentially letting others do it without having to assign a ton of hotkeys and explain all of them. The UI allows you to edit most of the important attributes of the creatures and their segments, like the radius of a segment and the distance between them.
Not everything originally planned for the editor was added. I wanted to have a behavior button for selecting how a creature should move, but ultimately decided it would be more effort than it was worth. In the original UI sketch I also had a camera lock button, for if the world was bigger than the screen, but that was more something I thought would be nice than something meant to happen.
UI Designing
The UI was probably the most planned out feature in the project. I started by making a mockup in Freeform with all of the information and options I need to show listed. The UI needs a way to select specific segments of a creature, which in this sketch I had as a scrollable list, but I decided later that that would be overly complicated and take too long to make, so I came up with a set of buttons I think solved the issue pretty effectively.
When I was satisfied with that I made another mockup in Google Drawings so I could get more exact proportions to use when creating the UI in the project.
UI Implementation
MonoGame doesn’t have any UI features built in, so I had to create every part of it. I started with making a base ‘UIElement’ class, which stores bounds (position and size), visibility, interactability, and a bunch of other generally useful things. Notably the class has events for the element being selected and being deselected. This makes the ‘TextField’ element better since I can wait to update anything until after a value has been entered.
There are also the following UI elements
- Panel
- A box that can be drawn with text on it
- Button
- A panel with click events
- SpriteButton
- The same as a button, except it supports drawing a sprite with it
- Menu
- Each menu has a list of UI elements that it handles, making it easy to disable/enable them all at once

Miscellaneous Details
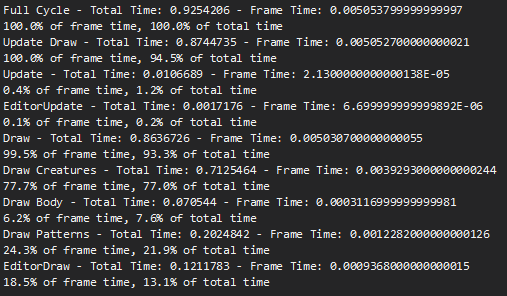
During this project I also made a performance profiler. The profiler has a list of timers that can be started and paused from anywhere in the program by the timer’s name. I used this to test the significance of an optimization I made by saving the triangles of a creature’s patterns for reuse. It reduced the frame time of the “Draw Patterns” timer from 20-24% of the cycle to 10-12%, around 2x faster. A similar optimization could be made with a creature’s body triangles.
Potential Future Changes
There are a lot of potential additions/modifications that could be made, but here’s a list of ones I considered:
- Screen wrapping and/or a larger map than fits on screen
- More pattern options
- Behaviors for the creatures (wandering)
- Collision (this would be difficult to do well)
- Better distribution of spline points (when a creature turns sharply, the spline points don’t end up evenly distributed and can make the mesh look off)
Conclusion
Overall I am happy with how the project turned out. I accomplished my initial goal of using splines to render this sort of procedural animation wholly, and was able to add in the patterns, which I think made the visuals a lot more interesting.
The UI also turned out well, although it was easily the most tedious part of the project. Both making the UI classes and initializing all the needed UI objects took a while despite their simplicity. The editor menu’s class is around 1,200 lines long, split between methods for events and initializing UI elements with the correct parameters. I think the way I went about it was probably the correct way though, since my planning meant I didn’t really have to second guess whether the work I was doing would turn out usable, and developing something to make the UI creation faster would take significantly longer than just making the UI manually given I didn’t need a lot.
I’m glad I decided to make the project in MonoGame since it made it a lot more interesting having to make everything from the mesh renderer, to the UI, the splines, and the procedural animation algorithm itself. It definitely did increase development time significantly, so I’m not sure whether or not I will do many future projects in MonoGame, but it helped me practice thinking through making a connected system of classes to build everything out in the way I wanted.
This is the first solo project I’ve done where I strongly used version control, but I found it really helpful and will probably be using it in all my future projects as much or more. If I broke something I was able to look at a previous working version to try to figure out what had failed. It also helped a lot with making this portfolio page, as it let me go back to see old versions of the project and remind me of what work I did at different stages in the project. I ended up making a separate git branch for all the animations on this page since it let me work on them without having to worry about breaking something in the rest of the project.
Positives and negatives of the project-
Positives:
- A lot of unique parts and challenges in the project
- Good version control usage
- Succeeded at initial goal
- Well planned
- Visually interesting
Negatives:
- Longer development time than if I had used a game engine
- Some unresolved issues in various parts of the project (patterns just cut off if they go past the end of the creature, sharp turns on creatures occasionally look jagged)
